Showing posts with label Organize. Show all posts

Tuesday, December 30, 2014

Inside my Erin Condren Life Planner 2014

Hey all! So I am going to do an inside view of my planner from this past year, all of these photos are from my instagram feed which you can follow me on here. I post a lot of planner related pictures which I wont always add here on my blog.

One of the first pictures I posted of a weekly spread (sorry its so pix-elated, actually a lot of these photos are pretty blurry I am going to work on that!) I was actually using a color code during this time, light purple was meals, pink was blog posts, blue was work, magenta was personal to-dos, Orange was bills. I used one sticker on this page and that was to indicate a pay day. It's interesting to look back in these early months and see how I have progressed, kind of fun. 


Monthly view for October. I use this for bills as you can see, I put them on the sticky notes and then when the bill is due I just move it over to the right of the monthly view in the notes section. That way I know what bill has been paid and what hasn't. I also keep track of my paydays and Zack's paydays so I know when money is coming in as well. Because I mainly use this for a bill tracker I decorate it all the time with stickers and washi tape. I got the candy corn washi tape from Target, and the Halloween stickers from Target and Michaels.


Here I started doing the one color pen per week because the color coding just became to much. I was keeping track of blog posts, meals, my momma's birthday, and other things. It's simple but the stickers added some fun to it. 


Here I tried something completely new and went with a Pilot G2 pen and just decided to write everything down in my brain that I thought of, which as you can tell was a lot. I wrote every detail down and I found that this type of method really does help me a lot. and I highly recommend the Pilot G2 pen. Also the only stickers I included this week were for functional purposes, so the workout stickers for workouts and the clean house sticker to mark a time when I needed to clean. 


Here I started to really get into decorating more. I put in an inspirational scripture from the Book of Mormon. Again the stickers are functional, a laundry machine for laundry, a clean house sticker, and a workout sticker.


Such a fun Christmas spread I did. I used the blue flags at the top to mark workouts. I used the hot cocoa sticker to say I needed to take a moment and sip some hot cocoa. A $ sticker for bills ( I wrote out what bills to pay that day in the square). A shopping sticker to indicate I needed to go grocery shopping. A nail polish sticker to change my nail polish. A temple sticker because I went to the temple. A popcorn sticker for date night for Zack and I. An actual date night sticker for an official out of the house date we were having. I really got into the functional stickers here. 


Again all the functional stickers, I love decorating the side page and just using a project life card as a to do list because it has more room.


Other side of that spread, it was super cute and fun. Many people ask why I decorate my planner this way, for me it just makes it really fun and really makes me want to open my planner and use it. I know this works for me because I have used my planner everyday for the last 6 months, I definitely have gotten my money's worth out of it.


And from this week in my planner, another scripture reminding me to trust Christ because He has been through it all.

There you have it, I will probably do a post like this once a month so you can see the inside of my planner often.
XO
Caitlin

Friday, November 14, 2014

Erin Condren Life Planner: Interchangeable Covers

You guys all know I am in love with my planner. I did an entire post about it HERE and HERE. I still use mine on a daily basis. Today I left mine home and I was not a happy camper. It has all my information in it for work, and home life. I love that I have found a system that finally works for me. I am going to do an updated Erin Condren Planner post in December on how I use it and I will also talk about the supplies I use on a daily basis. All my supplies have become an addiction #planneraddict and I love to share about it with others.


I tried to get all my covers into one photo and as you can see I failed. I have 9 covers and I just ordered 2 more today! They are such a fun addiction. What I love about it is that I often get bored with my planner cover, so its nice to be able to change it out and it feels like I suddenly have an entirely new planner. It keeps me motivated to use it and I must say I have used it every single day since I bought the planner so to me it is very worth the money. I know they are expensive, luckily for me my birthday is in January so I'm able to get one for my birthday every year and its the best gift ever!

How interchangeable covers work. Basically they punched holes into the cover and added slits so that you can take off the old one and put the new one on. Erin herself has done a video about it and I will link that here: https://www.youtube.com/watch?v=9-TCZ6ATGho

It really is so easy to change them out and in and I warn you it can be an addiction. However I have gotten most of mine at a discounted price, she had a sale in October for a Free Cover so I was able to get one free then. I also had a couple of coupon codes from previous purchases that were unique to me because customer service made a mistake on one of my orders. Then recently I got a $25.00 off coupon for placing my 5th order with the company so I got 2 more covers, why not! I love it and I get my moneys worth because I can use them year after year. I don't put the 2014 date on them, just my name as you see above and as long as the covers are holding up I am able to have them last a while.

Two of the covers you see above are from etsy shops that make covers for the life planner. We'll get to that in a minute. Here is a close up of all the covers I own now.


This one is the gold edition that came with my planner in the color spearmint.
The striped one with the gold bow is a cover I made myself and then uploaded it into the picture this cover on the site.
My actual planner cover I have on now is from an etsy shop called Evelyn Lane.


The cover on the left is fleur feliz in the splash pattern, I love this cover with a silver hold it together band, such a pretty combo.
The middle cover is the scales cover in Aquamarine and gold.
The cover on the right is the roses cover in pink, cause I love pink roses those are my absolute favorite of all time.


No we are to my Christmas covers. I love them both!
The first one is from an etsy shop and its called the Nutcracker cover. I have my name and then the saying is "May your days be merry and bright"
The second one with the triangles is called the jolly jester-Christmas cover and its sold at the Erin Condren site, isn't that Christmas tree so cute? I am in love with this one!


And last but not least I have the initial cover, this is in the color aquamarine and I chose it to say Holladay instead of my first name and I love it.

So there you have it, I will of course show you my two other covers I ordered today when they come in but for now I'll keep them a surprise.
Happy Friday!
XO
Caitlin

I forgot something very important! If you would like to receive $10 off your first order with Erin Condren use this referral link: https://www.erincondren.com/referral/invite/caitlinholladay0127-8974
It will take you to the site where you will sign up, once you are signed up you will receive your coupon code in your email address (it only takes about 15 minutes for the code to appear in your email), you can then use that code for your first purchase.  XO

Wednesday, November 12, 2014

Home Management Binder!

Happy Wednesday Everyone! As promised I am here to deliver my Monday, Wednesday, Friday posts. I have been working on a lot of blog stuff today and almost forgot to post. That would have been embarrassing. But I am here with a home management binder walk through. This is what I use to keep our house organized, it includes our budget, media inventory, cleaning schedule etc. Its a great tool to have and I can't wait to get to filling out the pages.  Lets Dive In!!!


The system I am using for the binder is the ARC system by Staples. I got the clear organizer for this project and I love it because I could choose or design my own over. 


As you see above the cover is clear and its pretty sturdy. I also invested in the Arc punch because it allows me to really use this system to its fullest. I can tear out the pages as I go, fill them out, then put them back in. I also add our bank statements from the previous month for budgeting purposes. Its like a filo fax, only 8 x 11 size and much more accessible for me.


This is my cover page, I got it from the etsy shop iheartorganizing. These printables are by Jen and she has great home binder printables as well as planners you can print off at home. Go check it out.


So behind the cover page, which I put in a sheet protector that I just used my arc punch to punch, I have this pocket folder. These are from staples here in packs of two, and are really handy to store my pay stubs for the year, receipts, pens, etc. They come pre-punched as well.


Behind the pocket folder I have a zipped folder, this holds stamps, stickers, anything like that sort of thing that I want to keep safe. I also got them pre-punched at staples here. They also come in packs of two. 


The next page is this special dates calendar, Jen has one in her shop that was mentioned above that I have in another calendar but this one I got from another etsy shop. They all serve the same purpose so it doesn't really matter which one you have. I just liked these colors. Zack wrote in our birthdays already, it was kind of cute, that was the first thing he did with the notebook when I showed it to him.

Next is the most used section! The budget. I printed off these pages for the rest of 2014, I put this binder together in August so I had 5 months in here. Page 1 has categories for rent, utilities, savings, income, food, clothing. Page two has these categories you see above, and page three has columns for Personal items, medications, free budget, eye glasses, cosmetics, toiletries, printer ink/paper etc. The vertical columns are for budget, actual, difference and comments. I love this system. I am just someone who writes things down and this really works for me, as I mentioned before I print off our bank statements from the previous months, highlight items in the certain columns and use that to put in our actual column. It really helps me to see where my money is going. Last month I was shocked to find out I spent around $500.00 on items that are completely unnecessary, this month I have a plan to really save that money and get back on track. These printables help me with that.

I made these myself but I know Jen has a very similar layout in her Etsy shop. If you would like mine specifically I can make those available as well. Let me know in the comments.


Page 3 of the budget worksheets.

Now behind those budget sheets I have the password tracker, there are a lot of websites that I go to and this helps me keep track of all the passwords. I pay the majority of my bills online so this is handy to keep in the budget section.


The next section is the media inventory section. I use this to keep track of our DVD's (I'm a movie collector), books, video games, etc. Anything media related goes here, we have a lot of STUFF :)


Behind the full inventory list is a checkout system. That way I can keep track if I let my family borrow books or movies for different things and I can bug them if I don't get it back.


The next tab houses this cleaning checklist. I like that I can write what needs to be done in these time frames, then I refer to it to make sure that the cleaning has been accomplished in our house. Even though we live in an apartment right now its still important to clean it.


 The next section houses this important info printable. Again from Jen's shop, all of the above mentioned printables can be found there as well. This one has information for doctors numbers, banking information, etc. Its handy to have it all written down for future use.


The next section is this gift giving plan, and then a party planning printable. I don't host many parties but I do like to use this guide to plan out gifts, especially during this time of year.


The next tab is cooking information, its a master list of our favorite recipes and another list for recipes to try. I was keeping this information in the back of my planner but it grew to be a really long list so it was better used here. The nice thing about these printables is that I can print them out as I need them, right now I have three in there, in the future I can get more and add it in as I go.


Last section is for the Master To DO lists. I always have a running to do list of things I basically need to do everyday, this helps me so I don't have to write those out every single day.  Instead I can get this laminated and use a white board marker.


Oops I forgot one section is for car maintennce. I use this tracker to help be on top of when our cars get updates and when its time to change something in the future. I printed two off one for my car and one for Zack's


And the end, I have more of those zip pockes and a folder pocket in the back and some pages for blog organization.

I love this system. It really helps to keep me organized. I use it everyday and I would be lost without it. Thanks so much for reading and let me know in the comments if you have any questions or want to see more details of something.
XO
Caitlin


Thursday, August 21, 2014

Many Uses for the Erin Condren Life Planner

I know back in January I blogged about how I use the Erin Condren Life Planner specifically for school. Well now that I have graduated and I am out of school, I use the planner to help manage all other aspects of life, including this blog. So this year they added some new updates and I just had to get a new one, I love it so much and its so pretty.


I love it! I got the gold edition this year and its so pretty, I got the color spearmint and I just added my name on it. I could have put the Holladay family or something but its just Zack and I so I figured I didn't need it. 


This is how thick it is. I got the 18 month planner so it goes from July 2014 to December 2015. I know it will last this long because I hardly take it out with me and its held up really well so far. Eek I just love it!!!!! 
Here's the inside:


Love the inside, I haven't written in the cover yet because its just too cute, I don't want to ruin it with my handwriting (anyone else have this problem). I love that gold polka dot vellum, its very fancy and just adds a nice touch.


You can kind of see how the vellum works, its just clear paper with the polka dots. 
Next you have the first cover page and I actually use that space to write down my color coding system, yes I have a system and yes I generally stick to it.


Also I love that its made and produced in the USA, I love to purchase products that are made here!
Most of the magic in my planner happens on the monthly view, I use that thing up:


As you can see I have been writing my bills down on sticky notes, then gym stuff and a lot of other lovely things I put down in the book. On the list over on the right I put my cleaning chores, like the bathroom, reorganize the dvds etc. On that card in the middle (its a project life card) I just wrote a list of things I wanted to do for the month. 


Here is the back of that card, I used a new Erin Condren Coil Clip which is a new feature on the planners this year. 
Here is a view of the right side of the monthly view:


I love marking my pay days and in August (You'll see in a minute) I started marking my husband's paydays as well. I also mark of the days of the month as we pass them, its just always been a habit of mine. 
Here is the August monthly view:


This month I marked the paydays using the little neon garage sale stickers. I loved that because it used up less space. Then I used the orange flag notes for the bills and in the upper right hand corner I move the bills over as I pay them. Even though church is always at the same time I always mark it off in my planner, then I put doctor appointments using the stickers Erin Condren gives you and I created my own stickers on her site. The brown sticker says Camping Trip and the Blue one says Temple Trip. 

I decorate the monthly view a little bit with Washi Tape. I get my washi tape all over, Etsy, Amazon, Target and Staples are my go to places. I have recently picked up some nice ones at Michaels and they always have coupons so that is a great place to shop for planner supplies. My stickers all come from Michaels as well. 


Here is what a typical weekly view looks like. On the Martha Stewart Dew Drops I write the chores I need to get done that day, on the lines down at the bottom I right my scripture reading (devotional) and my meal plan. In the night section I typically right my blog ideas and any other plans I might have. I transfer bills from the monthly view as well as paydays and write what is due. I mark the weather up at the top using weather stickers found on amazon and my iPhone. Again on the left hand side I write out a To-Do list for the week. 


Here is what a typical page view looks like without the decorations and colorful pens. I love the clear ruler so you can still see what is going on Thursday and not have it block that day. 


I love that it has a year at a glance calendar (I bet you can tell what I keep track of here). The planner also has a 2016 and a 2017 calendar in case you want to know when certain days are in the future. I always look at this to see what day my birthday is on. My birthday is always on a Wednesday or Sunday, kind of cool on leap year its always Friday. Anyway... onto supplies. 


I carry my supplies in this cute little makeup bag I bought from the clearence section at Target. It works great for planning on the go and I keep page flags, pens, washi tape, and sticky notes in this pouch. Here is the inside:


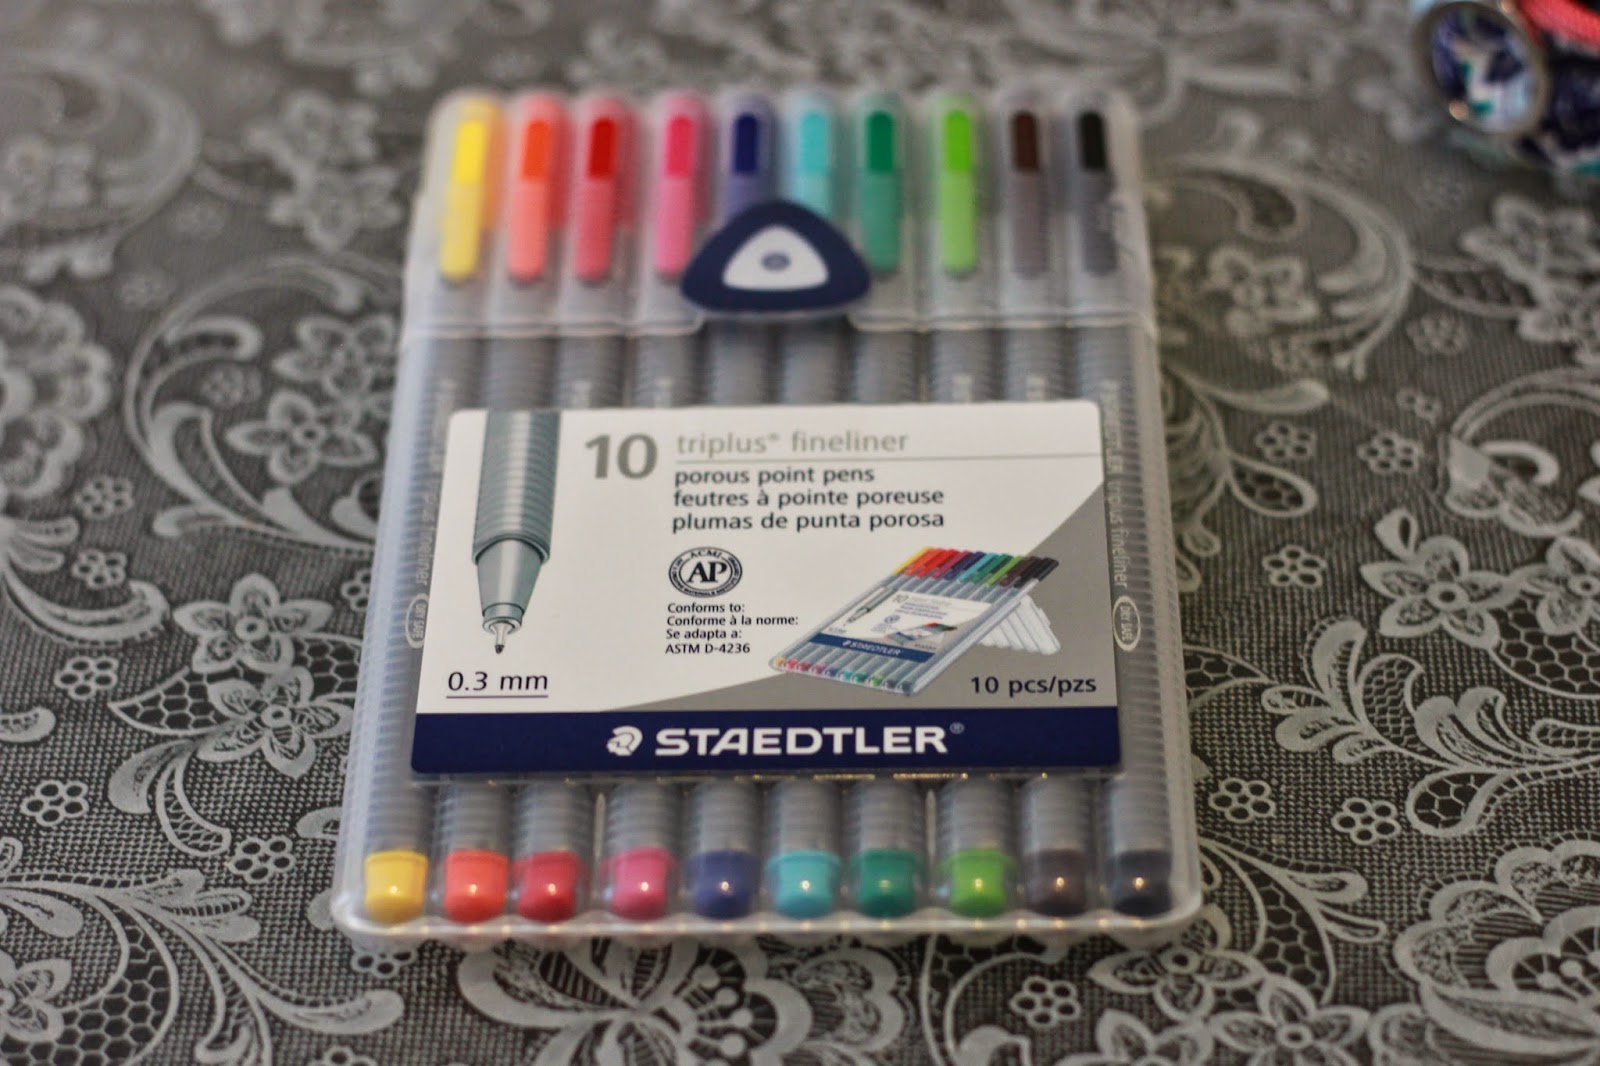
As you can tell I use the papermate flair pens the most in my planner. They are so vibrant and bright and I just love the way they turn out on the page. I love colorful things. I also use the Staedtler pens, which offer a more refined point but are equally as vibrant. I also have the sharpie pens and I generally switch out between the Staedtler pens and the sharpie ones quite often. 


Next the project life cards: 


This book I bought at Target in the scrapbook Isle. As you can see it came with a lot of different patterns and I just think the they provide a great addition with the coil clips to my planner. 
Next I have a sample of the Neon Garage sale dots I bought at Target. They were $3.00 I want to say and come with 300 stickers so I highly recommend those for things you have to jot down every month. 


Here are there weather stickers I talked about, super cute:


Washi Tape I bought at Staples in a set. I just love how all these colors tie in together and it cost $9.00. 


And last but not least how I store my Washi Tape, in this caddy I found at the Dollar Tree. 


Well there you have it folks, I hope that gave you some great ideas for how you can organize your supplies, and your planner. 
Check out the Erin Condren planners and use this link to get $10.00 off your first order. (To get the $10.00 off you must sign up with an email account using the link, the coupon code will then be emailed to you)
XO 
Caitlin
(PS this post was not sponsored, I bought all products and supplies with my own hard earned money)